Showing posts with label Desserts. Show all posts

Wednesday, January 27, 2010

Northamptonshire Seed Cake: English Teatime Cakes

My Good Friend Mr. McNair got me a few new cookbooks for my birthday. Two of these were cute little English cookbooks, one called: Traditional Puddings the other is English Teatime Recipes (Traditonal Cakes from around the Shires)

They're both done with the cutest little water color paintings on each page & recipes with names like: Kentish Cob-nut Cake, Yorkshire Sticky Parkins. I was so tickled with these downright homey sounding little treats. So I finally got around to making one the other day. It's so easy you gotta try it. The combination of caraway seeds & freshly ground nutmeg was just too good. Here's the recipe if you wanna try it. It says:

"A plain cake flavored with nutmeg & caraway seeds, traditionally served at sheep shearing time."

Northamptonshire Seed Cake:

- 8 oz butter (it's 230 g. of butter but one 200g block is fine. 1 cup)
- 8 oz sugar (about 1 cup, but it's waaaay to much so I cut it down to 1/2 a cup)
- 4 eggs
- 8 oz flour (230 g. flour, or 2 cups of flour)
- 1/2 tsp baking powder
- 1 tsp ground nutmeg
- 2 tsp caraway seeds

Set oven to 350F (180c) Grease a 8 inch round cake tin. Cream butter & sugar & butter in a bowl till light & fluffy. Place eggs in a bowl & set over a saucepan of hot water & whisk until fluffy, whisk into the butter mixture. Sift the flour, b. powder together & nutmeg & fold into the egg/butter mixture. Add caraway seeds & combine well. Turn into the prepared tin & smooth over the top. Bake for 1 1/2 hr covering the top with a piece of kitchen foil if it appears to be browning too quickly. Cool in the tin for 5 minutes then turn out onto a wire rack.


Saturday, November 14, 2009

Caramel Pumpkin Pie

I promise to not do any more caramel after this but I had to give you this recipe in time for you Thanksgiving cooks.

This pie has a great way of making caramel that I think you "classroom scientific" type cooks will find fun. It involves smoking sugar in a pan & other such questionable behavior. But all in all quite interesting. Remember when they'd tell you that white sugar was brown sugar burnt? Well, caramel, apparently is white sugar burnt....and, gosh darn it.....somehow it's brown again. So, we're all good!

And the result is of course fantastic. The caramel will give your pie a really rich dark color (if you make your caramel right). And served at room temp with ice-cream. It was fantissimo! I'd say it's probably for a more grown up audience, esp if you let the caramel darken enough. I served it to my grandparents & was slightly embarrassed when Miss 2# announced, "Is that Rum? I knew I recognized the taste". heh!!

I've left the recipe in it's entirety as it's something you want to read through before you start.

You can also find my pie crust recipe here. Have fun!! And lemmie know what you're making for Thanksgiving. I'm looking forward to my unique Thanksgiving & contemplating what to make that won't involve baking anything other than the turkey in the last 4 hours before dinner. Any ideas?

Caramel Pumpkin Pie

1 9 inch single pie crust Partially baked & cooled

1 c sugar
3/4 c heavy cream
2 tbsp dark rum or cognac
2 tbsp unsalted butter cut into 4 pieces
1 c pumpkin puree
1 1/2 tsp ground cinnamon
3/4 tsp ground ginger
pinch of nutmeg and allspice
pinch of salt
1 1/2 tsp vanilla extract
2 large eggs

Getting ready:
Center rack in oven & preheat the oven to 350 f (175 c)

Sprinkley 1/2 c sugar evenly over the bottom of a large nonstick skillet. Place the skillet over medium heat & staying close cook until the sugar melts & starts to color. Once you see a little color gently swirl till it turns deep amber -- almost mahogany. The sugar will bubble up & foam & start to smoke. It's very dramatic & might make you think you've gone too far, but you want a dark (though not burned black) color; the darker the sugar the fuller the flavor. When the bubble s have gone from foamy to big & fat, you will probably have reached the right color. To check, drop a bit of the caramelized sugar on a white plate.

Lower the heat to medium, stand back & pour the cream into the skillet. The sugar will bubble & hiss &, if the cream was cold may even clump. Just continue to cook, stirring, and it will even out. Add the rum & butter & cook just until the caramel is smooth. Pour the caramel into a heatproof bowl or pitcher & cool for about 15 min.

Working with a whisk in a large bowl, beat the pumpkin to break it up & smooth it. Add the remaining 1/2 c of sugar & beat to blend. Whisk in the spices, salt, vanilla & eggs. beating until the mixture is smooth. Whisk in the caramel. Rap the bowl against the counter a few times to de-bubble the filling then pour into the crust.

Bake for 45-50 min, or until the filling is puffed and set -- tap the pan gently and the filling won't giggle. A think knife inserted into the center of the pie will come out clean. It will also leave a gash in the filling but you'll be covering it with whipped cream.

Trasfer the pie to a rack & cool to room temp, or cool & refrigereate. When you are ready to serve. Spread the lightly whipped cream over the top of the pie.

Monday, October 26, 2009

Speaking of Caramel.......Try this! -- Caramel Peanut Topped Brownie Cake

Caramel Peanut Topped Brownie Cake (by Dorie Greenspan)

I know this is going a bit far, but if you have a special occasion for a yummy little treat you've gotta try THIS one. It's chewy, it's goey & it's PERFECT for a caramel/chocolate lover. The recipe is long but result is well worth it. Lemmie know how it goes for you.

PS. I did cut out the white sugar in the cake but don't try cutting any sugar in the caramel sauce or you'll have a mess. Good Luck!

Pic & write up of recipe borrowed from wee treats by tammy's blog because mine looks like this....

Yeah, looks like someone overindulged in whip cream.

For the cake:

1 cup all-purpose flour
1 tsp baking soda
¼ tsp salt
1 stick(8 TBSP) unsalted butter, cut into 8 pieces
3 ounces bittersweet chocolate, coarsely chopped
3 large eggs
½ cup light brown sugar
¼ cup sugar
3 TBSP light corn syrup
½ tsp vanilla extract

For the topping:

2 cups sugar
½ cup water
1 ½ TBSP light corn syrup
2/3 cup heavy cream
2 TBSP unsalted butter, at room temperature
1 cup salted peanuts

Butter and flour a 8 inch springform pan. Line bottom of pan with parchment paper. Put the pan on a baking sheet lined with parchment paper.

To make the cake: Whisk the flour, baking soda and salt together. Melt chocolate and butter together using a double boiler.

In a large bowl whisk the eggs and sugars together until well blended. Whisk in the corn syrup, followed by the vanilla. Whisk in the melted butter and chocolate. Still working with a whisk, gently stir in the dry ingredients, mixing only until they are incorporated. You will have a thick, smooth, shiny batter. Pour the batter into the pan and jiggle the pan a bit to even out the batter.

Bake the cake at 350F for 40-45 minutes, or until a knife inserted into the center comes out almost clean. Transfer the pan to a rack and cool he cake for 15 minutes, then run a knife between the cake and the pan and remove the sides of the pan. During baking the cake probably will have puffed to the top of the pan don’t be concerned if tit sinks a little or it if develops a crater in the center. Cool the cake to room temperature.

When the cake is completely cool, invert it, remove the base of the pan and peel off the paper. Wash and dry the springform pan, and return the cake to it right side up. Refasten the sides around the cake.

To make the topping:

Put the sugar, water and corn syrup in a medium heavy bottomed saucepan, stir just to combine the ingredients and then put the pan over medium-high heat. Heat, without stirring , until the caramel turns deep amber., 5-10 minutes. Lower the heat a bit and, standing back from the saucepan add the cream and butter. When the spatters are less vehement, stir to calm down the caramel and dissolve any lumps. Stir in the peanuts, and pour the caramel and peanuts into a 1-quart Pyrex measuring cup or heat proof bowl.

Spoon the peanuts on top of the cake. Then spoon the caramel on top of those. You’ll have a layer about ¼ inch high. Allow the topping to set to room temperature-about 20 minutes before serving.

To serve, run a blunt knife between the caramel and the pan and simply remove the sides of the springform. If this isn’t the case, hit the sides with some hot air from a hairdryer or wrap the sides in a towel moistened with hot water.

Wednesday, October 21, 2009

Making of the Caramel Sauce

Heya heya! I'm having a blasty-blast looking at everyone's "childhood nasal memories" and I gotta tell you, I think I can answer that question "What's wrong with Japan?"

It's the mothballs & kero, for sure!

Well, here's the part where I show you what I put into the "giveaway" winner's Jar of goodness.

It's all so straightforward but being the lunatic that I am my DH came to see me taking pictures of a saucepan like a mad scientist:

"Caramel great, what's it for?"
"I'm giving it away
"
"Remind me why you do this again??"

"Because..........it makes me happy!
"

......yeah.....I'm a deeeeep thinker, I know, but it's the truth. And since we're speaking of the truth, lets just be clear that this whole thing starts out with a whole cup of white sugar completely dissolved over a low flame with 1/4 a c of water. I know.....we all try to be in denial about what this sauce is all about but let's just gaze upon it for a moment,
Ok....good. Is everyone in touch with reality now? Great! Let's just shake it off & forget we ever saw that.

Oh.....but wait, more goodness you say? 1/2 a cup of butter? How could that be wrong
My, that looks so healthy & fine in a nice little square. But let's just take a look at it in it's pure unadulterated melted FAT CONTENT........
Gee......that's a lotta fat. What can you say, it takes pain to be beautiful.....& it takes butter to have caramel, so loadm' up!

Now the trick here is to melt the butter & give it a couple of good stirs with the spoon to incorporate it & then NOT MIXING IT keep your flame of medium/low leave it to bubble, splat & sputter till it slowly changes from this
to this
to this and so forth
If you stir it you'll find that the sugar will crystallize & gunk up your spoon & you'll possibly have some bits of gunky stuff at the end

Now when you're almost at your desired caramel color you'll have to lightly stir it to keep an eye on the color & of course burn your tongue FOR LIFE tasting it to see that it be good indeed.

There are still grown ups who wander the world with brown sugar caramel stuck to their roof of their mouths from pre-adolecent greed driven evenings of impatient caramel popcorn making fiascos. Not to mention the catastrophe that ensued when Almonzo tried to feed it to his poor pet pig. (Note: Farmer Boy= Best foodie lover book evaaaah!)
Now I personally like a more dark & burnt caramel flavor but I wasn't sure about you so I went ahead & kept it at a pretty reasonable golden brown medium.

Last but not least we do the fun part of adding........WHY LOOKIE THERE............yet more fat in the form of 1/4 a c real cream. Now don't go sticking your nose in there when you do this as it'll bubble up quite a bit
Give it a good mix-a-roo & there you go.

Glistening & calling the name of YOU!
Now a word on storage & usage. You wanna keep it in the fridge (good luck w/ keeping snitchers at bay) & you'll have to heat it up a little to loosen it. You can either put the whole jar in a saucepan of cool water & bring it to a simmer shut off the heat & leave it to heat up, or you could scoop out a bit & microwave it for a few secs.

PS. I hate to admit it but Kero is also on my list of childhood smells. Along with Obachan's oden, kotastu, sunscrean & the smell of the beach, stank & all, esp the "sex wax" the surfers would leave all over the place. And my dad's musk cologne that every man in the 80's must've also been wearing.

Friday, February 27, 2009

Berry-Berry Yummy Cobbler

Dear Sister that I love,

This post is for you! You know who you are, because you're the only one whose trying to click on that picture to enlarge it & then make it your wallpaper. You're also the only sister that's capapble of doing this:

to a raspberry cobbler.

So, I hope you don't mind if I share your secret with the world. Because simple things in life that make you cozy your knees up under your massive sweater while you swivel around on Daddy's big chair & giggle with our cornball brothers, while slooooooowly enjoying this cobbler -- should not be kept secret. Besides, the more people who we can pass the word to, the greater the chance of you walking into some stranger's home & having them shove a massive cake pan of crispy/gooey warm fruity goodness under your nose for you to cherish. Can't argue with those kinda odds.

So here we go:
I know you're partial to raspberries but since we happened to get mutant strawberries for very cheap & frozen blueberries (non-mutent, I think) we'll go with that. Chopping them up just seemed like the right thing to do. Since I think a "whole strawberry" would just be too much "gooo" for me.
I got myself 4 cups of fruit. I didn't forget to rinse the frozen blueberries since the last time I didn't they turned my muffins positively greenish black with all the icy blueberry juice surrounding them.

Now, since you know I ain't a rocket scientist & I don't do this from scratch, lemmie just give you the specs on the "drys": 1 1/4 cup of flour, 2/3 cup of sugar, 1 tbsp baking powder, 1/4 tsp salt.

I gave them a little whisking around because it also made me feel good. And this is a "feel good" kinda snack. (truth: Erika wouldn't leave me alone unless I gave her something "useful" to do)

Now since you're preheating your oven to 175c anyway, throw in 1/2 c or 1 stick or 113 grams of butter into a 9" cake pan or casserole dish.

Look, I know you're thinking, "Butter, Margarine, same thing!"

To that I say, "SILENCE or VIOLENCE"!

If you've gone as far to get a 380Y bag of raspberries, go over to the dairy section & get a 370Y block of butter. After all, this is cobbler!

Give it a few minutes in the oven & swirl the butter around a bit. Not because it needs it as much as it's sort of a little game I play to see how close I can get it to the edge of the pan without spilling it........yeah, that's the kinda game you'd play too isn't it?

Your wets: 1 cup of milk & 1 tsp of either almond essence or vanilla essence! Let's walk on the wild side & use almond. I know you wanna! Could it possibly get any easier? Just pour it into the dry & blend till just combined. I know you're not the type to over-mix but still I have to warn you anyway. Tough cobbler is just not romantic in the slightest bit.

And now for the fun part! (as if up until now you haven't just been a blasty-blast) The part where I pour with my left hand & simultaneously take pictures with my right hand & try to do it artistically at the same time. Whatever that means.....I think it means, just plop that batter in there already.

Now take a moment to observe. See the ring of butter around the edge?

I think it's time for a "moment".

That sweet sister, is sheer goodness & love in a cake pan. I tell you things just don't get any better.

Well, now............I think they just did. Things got much much better!

There's nothing like a massive pile of berries plopped on top of your batter of goodness. And no, you may not snitch more than 5 pieces of fruit. Stop it already! I think I could've stood to spread it out more evenly but I have a certain fondness to the crusty edge so I kept it to the middle & pressed it down into the batter a bit.

Let's just have another moment shall we?

.................
.................
........be still my beating heart!

Now it's time to put our baby in the oven. Surprisingly long cooking time (50-55 minutes) gives you plenty of time to clean up, change into your jammies or go get yourself an ice-cream to top it with. You thought I forgot that? NEVER!!

Now, let's see how things went.

Well now, if that doesn't just beat all. The edge should be browned crispy and the cobbler gets softer & softer as you get nearer to the center it may be somewhat soft or gooey looking. So, there you have it. If you've got any shread of sanity (of course you do) you'll do as I say & consume this after it's cooled down for about 10 min & top it with ice cream.

Well, that's it, sister! You know that bite there has your name on it. The one where the ice cream is melting down the side of the cobbler & is silently begging you to save it before it all melts away!

I love you & when you come by this way, there will most certainly be a healthy bowl of this "berry good cobbler" waiting for you.

Mucho love,

Your silly big sister

PS. I'll bet this cobbler would be just as good with any juicy fruit, mango, kiwi, peach, nectarines or even apple.

Sunday, October 12, 2008

German Chocolate Cake

This is the cake Lani wanted for her 11th birthday. Just so you can get what kind of caliber kid she is, she wanted it because it's her Grandpa's favorite cake. (for real!) What a sweetie!

I've been using this German Chocolate Cake recipe from Allrecipes.com the last several times I made it and used this Icing recipe with very good success.
The drizzling of the chocolate down the sides just was the clincher for me. It looks like one of those "big bang" cakes that just happened when you took some flour/chocolate/coconut & walnuts & just threw them together & BANG.....you have a goopy wonderful mess of chewy buttery frosting & chocolate delight.

I don't make this cake very often as it's pretty pricy & time consuming but the result is VERY rewarding. And in case you ever do...here are a couple notes:


- Use Butter in both recipes.....soooo much better than margarine. (or at the very least, in the icing)
- Cut down the sugar to 1 1/2 c not 2 in the cake, and down to 2/3 a cup in the icing
- Cut a round stencil of wax paper to put on the bottom of the baking pans for easeir removal.
- Toast the nuts & coconut flakes before making the icing.
- Also, Evaporated milk is hard to find in Japan but take NO substitutes (you'd find it in the creamer/coffee section of the supermarket)
- Pecans are near impossible to find (at a reasonable price) so walnuts work pretty well instead.

Well, short & sweet.


OK....Alright now, stop licking the screen & go eat something healthy!

Friday, October 03, 2008

A Friendship Galette of Science!

Yesterday, I made a impromptu rustic handy-dandy galette for a friendly friend named Flo-jo. From start to finish in 30 min. flat. That's not to take away from the vast amounts of love I put into it. Of course the fact that I had a pre-made ball of pie dough in the fridge was a help. (The other half was used for a pumpkin pie episode w/ the kids)

See, DH was getting ready to do some shopping & swing by her place. So upon remembering you, dear Flo, I dashed to the kitchen to think of the best way to make you something yummola. I hope you liked it & I hope it won’t put you off to know that I followed absolutely NO recipe to make it. It was a total random act of cooking spontaneity, but it was loving spontaneity. (that makes it better doesn’t it?) For anyone who would dare to try it, it went like this:

Grab the dough from the fridge roll it out nice & round like with a handy-dandy rolling pin, on some wax paper. (Because we always have pie dough just sitting in our fridges don't we?)
Poke a couple holes in w/ a fork. Ransack the cupboard for canned fruit, since anything fresh was devoured 2 days ago..…..ok, only one can of pears & a can of peaches, well, that'll have to do. Slice them, throw in 2 tbsp of granulated sugar & 2 tbsp flour, a few shakes of salt, 1 tsp cinn, ½ tsp cardamom, ¼ tsp cloves (no nutmeg in the spice shelf today), grate up about 1 tsp orange peel & 1 tsp lemon juice, & approx 2 tbsp reserved pear juice from the can. Ward off nosey children that are desperate to know what the cooking project is for. Explain to them about "Friendship Pies". Console them that they are still your "friend", but just aren't going to get any pie!

Throw it all on the pie crust, feel good about yourself for a moment....you are on the verge of either something great or something really retarded. fold over the sides nice & “rustic” like! Try not to despair if it looks like your last play dough project. Throw it in the oven at 200c for 20 min. And……try not to panic as you imagine it flattening out completely & looking like some large misshapen fruit filled cookie. Well...........what do you know. Lookie there, not half bad! Brush one egg yolk mixed w/ one tbsp of water over the crust to give it a shine!

I’m sorry, I could barely contain myself I thought maybe I could get away with breaking off a huge chunk of it & hope you'd think that was just part of the whole "rustic" style . I’m a sucker for pie crust. Really, it's an addiction....(I'm ashamed)....at times I'm tempted to do away with the filling all together & just make a pie full of, well, crust.

I was curious of how it tasted, I have a feeling it was pretty good cuz’ some of the filling came out the side & it was great. Cardamom sorta sneaks up on you & has a great spice that kicks in as an aftertaste.

Well, I guess, that’s all I have to say about that! G'night Friend!

Wednesday, August 27, 2008

Frozen Delight!

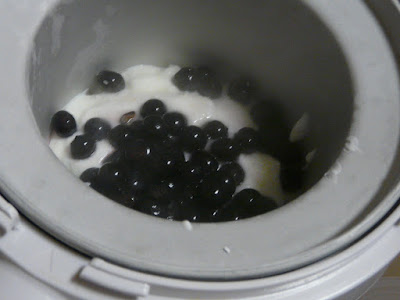
I can’t believe summers almost over and I’ve only used my ice cream maker 3 times. And only once for actual ice cream. But I’ve discovered the simplicity of frozen yogurts. If you can believe it Japan is not really big on this upper yummy alternative to ice cream. Though secretly I'm not as into the health properties as I am into the simplicity of preparing it. But I’ve found that all I need is a carton of yogurt some fruit & a frozen ice cream maker “canister”.

This is my Raspberry/passion fruit frozen yogurt. First I made the Raspberry part. 1 500ml carton of yogurt, ½ c of frozen raspberries thawed, & a couple tbsp of honey. Then I made the passion fruit part with another carton of yogurt ½ c of passion fruit jam, and a little yellow food coloring for good measure. Give them a little toss together & put them in the freezer to set but not harden. And that was a nice little after-dinner dessert with a guilt free conscious for mommy! This one was a simple blueberry one. (In the first picture) As we all know, fresh blueberries are pretty expensive in Japan but I found some that were grown in our prefecture for 200Y for a cup, not bad! Smashed a few, left a few whole & blended with yogurt & honey. Voila! I would’ve actually thought adding some swirls of blueberry jam when it was already firm would’ve been ideal, but this was great anyway.
I’m scheming to make some watermelon/vodka sorbet with the remainder of the sweet enormous watermelon DH got us. I just need a hot day to justify it. We’ll see.

Wednesday, August 06, 2008

Can We Make It? Yes We Can!

So one upon a time, my handy-dandy sister who is the culprit of all things daring/brazen & bizarre in the kitchen asks me if I'd try this ice cream. Wonder of wonders I happened to stumble across this person's blog already when looking for Lebanese recipes and it just happened to be when she was on a deadly 20 days of ice-cream "thing"! (shied your eyes, ice cream fans)

Well, I finally found the time and with a little help from my friends we did indeed make Olive-oil Ice cream.

It was a basic custard/cool/churn recipe. Which you can find here. I slapped the custard together while making dinner. This is it in it's baby stage. See, check out the olive oil, all glistening & golden on top.
I must be honest & say that I did try the balsamic chocolate sauce. But it was a bit of a boo-boo. (scratch that it was a raging, hard core, painful, catastrophe.) I think that when it says "good quality balsamic vinegar" it really does mean that. Check the label. When your vinegar has "caramel color" in it, it's not a good sign of quality. Or it could have to do with the fact that my baby just happened to have a massive poopy & I washed & changed him & came back to a sulfuric-nose-biting mess. (hey, if you want a real thrill, take a big nose-whiff of boiling balsamic vinegar. GOOD MORNING!) .......................so that went down the drain.
Of course the best part about this venture is the fact that my sister coincidentally happened to come by & visit the very morning that I happened to complete it with the kids. We got this ice cream maker last year but only used it twice.Here they are looking all useful & solemn.

"I'm useful"

"I'm solemn"Not everyone wanted to churn......somebody wanted to climb into the sink!The result was a shockingly great flavor, everyone who tasted it thought it had a nutty aftertaste, so once Elaina showed up we chopped up some walnuts & mixed it in. And while the daddies & Uncle Dan-dan got sun-stroke at the park with the kids -- sisterly love continued in the air-conned dining room where two happy ladies indulged in a good chat & some nice Olive Oil Ice-cream.

.......and they all lived happily ever after! (of course the kids got some too)

Monday, July 07, 2008

Coconut Bread Pudding

If bread pudding makes you think of a soupy soggy log of mashed bread, baked to form a new & more alarming loaf of mashed bread, look away! Or, look on & be converted. My bread-pudding-wary-10-year-old has finally been converted after this morning. I think the secret is adding a water bath to the baking tray you put the pudding on. That keeps it from drying out, but you still get a crispy top.

I gotta tell you, the coconut cake was a good touch, I was a little wary of trying it but the taste & consistency of the coconut is even better warm than cold, the pieces near the top got all chewy & candy like, with the addition of a coconut sauce…..sigh…….it was almost enough to forgive Mr. Manly for licking his plate and greedy husband going for thirds.

I thought it would have even withstood some canned pineapples but I wasn’t feeling THAT adventurous.

Anyway, here’s the score:

12 c. old bread, cubed (or leave it out overnight)

2 c milk
2 c coconut juice (minus the meat)
1/3 c butter
4 eggs
½ c brown sugar
½ tsp salt
1 tsp nutmeg
2 blocks of coconut cake (cubed into 1/2 in. bits)

Heat the milk/coconut juice & butter over low heat till the better is melted.
Mix eggs, sugar, salt & nutmeg in large bowl till blended.
Pour bread cubes & coconut cake over eggs & mix (gently, please) till egg goo is incorporated
Add milk/coconut mixture over bread cubes, barely mix & pour into an un-greased 8-12” baking pan. Preheat oven to 180c & set the baking dish in a baking tray filled with water. (add the water to the try after you preheat -- or you’ll never get your oven hot, and before you put the pudding in – or you’ll splash.) bake UNCOVERED for 45-50 min.


Coconut Sauce

½ c butter
1 c brown sugar (owwie-do!)
¼ c coconut liquor


mix butter & brown sugar over medium heat till blended & simmering, add liquor & stir till blended.

How much easier can you get? This is a very simple variation of my even simpler bread pudding, usually with the addition of cinnamon & ½ a c. of raisins & a whisky sauce instead. (the actual recipe that I found only calls for 2-3 tbsp of whisky but I add ¼ c and give everyone a nice warm fuzzy feeling at breakfast.

But nothing makes you feel fuzzier than your 4 year old son surmising, “You know mom, your bread pudding is pretty good, isn’t it?”.

PS. The Whisky sauce is totally righteous on vanilla ice-cream. Ohh-la-la. Use REAL butter and it’s even better!

PPS. If you’re as short on time as me, do the prep the night before & put it in the fridge. It makes for some simple breakfast prep when you throw it in the oven while you’re making your coffee.