Showing posts with label Italian. Show all posts

Wednesday, September 09, 2009

Blessed Bread ALONE: Focaccia

Recently someone asked me how to make Focaccia & I directed them to my blog saying that I had posted the recipe. But after searching I realized that I had NO such recipe posted yet. I mean.....REALLY? I've been making this recipe nearly as long as I've been making pancakes! Great balls of steaming ooger! The time to post is now. (though technically this draft has been sitting on my dashboard for months)

Now, If I may let you in on a little secret:

You have permission to be a mediocre cook but if you can bake a loaf of bread you'll pass as a kitchen genius.

Try it, next big meal take a little time to try out some bread and you'll have guests grabbing hold of your ankles refusing to leave. How do I know this? I am yet trying to shake off ankle holders now. (they are roughly between the ages of 5-1)

Honestly, people. This bread was one of the first breads I tried making & believe me, there's nothing like being hailed a genius when the only things you can actually make in the kitchen is scrambled eggs & focaccia. Observe:
Here I am posing as an impostor cook, looking smug, & mismatched. It's pretty obvious the only thing I've actually accomplished in the kitchen is drink several beers, make bread & successfully convince people I can cook. I admit I even pulled this on my boyfriend and he is yet still my boyfriend.

So please, pretend that you're not paranoid of yeast & get cracking: (Hint, the secret to a good focaccia is in the triple raising)

5 c of bread flour or all purpose flour (use 1/2 extra tsp of salt if using all purpose flour)
1/2 tsp salt

2 1/4 tsp active dry yeast

1 tbsp sugar

2/3 c olive oil (You only need 3-4 tbsp for the actual dough, rest is for topping)

2 c warm water (40 c) (Set aside 1/4 of the water for yeast)


Dissolve sugar in warm water in a bowl sprinkle yeast on top & leave undisturbed for 10 min.
Sift flour, salt together in large bowl. Make a well in the center pour yeast/water in & mix till blended (there will be lumps & crumbliness) then make another well & add olive oil & remaining 1 3/4 c warm water. Mix with wooden spoon till it comes together then turn out onto floured surface & knead for 10 min. (If you have a stand mixer you can knead for 6-8 min)

The dough should be soft but not too soft to handle. Add more flour as needed.
Turn the dough into a oiled large bowl & set in the oven or warm place (covered with towel) for 1 1/2 hrs till it's doubled in size.

Lightly oil two baking trays, or of you like use two 9" cake pans (this will give you a much fluffier, thicker focaccia), punch dough down shape into two balls roll or press into the pans, cover the pans with towels & let it rise again for 30 min.
Preheat oven for 200c (400f)

Using your fingertips press dimples all over the dough's surface. Drizzle the remaining oil over the bread. Sprinkle generously with seasalt.

The most traditional topping is rosemary sprigs. But there are heaps of toppings that you can choose from & or improvise with some ideas are:


sliced red onion
coarsely ground walnuts or pecans

black olives halved

sun-dried tomatoes

cherry tomato halves
sprinkling dried basil

fresh basil leaves
brown sugar (about 1 tsp per loaf)

bits of anchovies

parmesan cheese


Let the dough sit again for another 30 min then bake for 20-25 min till golden brown. And that's about it. Cut & serve warm.


I try not to let my foccacia get too "busy" with toppings. Usually pick 2 or 3, max, besides the olive oil. Of course if you add a pizza sauce & cheese before the toppings then "BAM" the evolution of pizza.

Also if you have a bread maker you can set it to "dough" and put the ingr. in according to the maker's instructions till the first rising

Well, that's it & as you can see I have no actual picture of the finished product & that is because no matter how much I make there is almost no left overs at all. EVER! Sneaky guests have been observed sneaking back into the kitchen at midnight with their head in the fridge eating left over focaccia straight out of a ziplock bag. (yeah, you didn't think I knew it was you, didja?)

Afterthought about bread sticks:

PS. If you wanna make bread sticks divide the dough after the first rising into walnut sized balls & roll out to about 10 in sticks. Leave to rise for 30 min, then brush with olive oil & sprinkle with whatever topping you like. (caraway, dried basil, oregano, sesame seeds, poppy seeds etc..) & bake for 15-20 min till golden.

PPS. A simpler option to toppings on bread sticks is to add seasoning to the dough before kneading.

Monday, February 23, 2009

Quick Tuna Pasta

If there is one word I love to hear in a recipe's title, it's the word "QUICK"!

For "quick" is most often the only thing I have time for. The good news is this beautifully glistening pasta sauce is among the fastest 3 pasta meals I know how to make. (and by meals, I'm not talking about something that comes in a can or plastic package from the store) So, lend me your metaphorical ear & we will throw it together.

I must warn you, I've always had a bit of a a paranoia about posting pasta recipes. There's a lot of mystique surrounding the method for making "perfect" pastas & I sure wouldn't want to bust anyone's bubble about the "proper"" way of doing things. So let me just say this recipe is a 100% "Al'-wings-it-big-time-pasta-QUICK-recipe-of-science"! OK? Soooo, now that your mind is at ease, run to the kitchen NOW!!! Not a moment to loose!

Here's what we need:

400 g. of canned tuna (how many cans that is you'll have to figure out yourself, I use about 3-4)
600-800 g. canned tomatoes (again, I use 3 2oog cans)
1 large onion
5 cloves of garlic
a bottle of E.V. olive oil
5 sprigs of fresh rosemary from the back yard (or 1 tsp of dried)
2-3 sprigs of fresh basil (or 1/2 tsp dried, personally I just skip the basil if it's not fresh)
2 dried peppers
sugar
salt & pepper
Parmesan cheese to top & basil
700g-1 kg pasta noodles

Now grab a heavy bottom pot for the sauce & a large pot for the noodles, QUICK, go to work, you need about 1 hr flat starting from 5 minutes ago so PANIC! (just kidding, we never panic in the kitchen).

Fill the large pot with water & throw in 2 handfuls of salt till you're pretty sure it tastes like the ocean. Dump the canned tomatoes into the saucepan & bring them to a boil then lower the heat & simmer. You'll need to simmer the tomatoes till they are about 1/2 the amount you started with. It'll take about 40 min.

Meanwhile peel & slice the garlic, slice the dried peppers & wash & chop the rosemary. Put them all in about 1/4-1/3 c of olive oil in a small skillet. Leave them to soak while you chop up the onion & open & drain the canned tuna.

Saute the garlic/olive oil mixture on low till the edges of the garlic are just starting to brown then add the onions & saute for another few minutes till they're translucent. Shut the heat off. Add a little salt & pepper to taste.

Now you'll probably have a bit of a window of time here if you've timed it right. So twiddle your thumbs, run around naked (yeah, you didn't think I knew about that did you?) or restore order to the chaos that has just ensued from you deserting your kids for a full 15 minutes. Most likely though you'll just have time to throw together a salad & dressing or what have you.

If your tomatoes are starting to look thicker & more like "sauce" & less like "tin tomatoes" then chuck in the garlic & onion oil & add a little sugar. "Little" is of course open to interpretation. I usually add about 2 tbsp. You just want to offset the acid not turn your pasta into ketchup. Let the sauce simmer for a few more minutes before adding the tuna. Don't over mix the tuna. I like a few chunks not a mass of blended tuna business, you know what I mean? You also might want to throw in a few more tbsp of olive oil. Because as we all know the secret to any yummy pasta is the oil.

By this time the water should be boiling & you should be counting down to dinner. So boil your pasta al dente. And if your in a real hurry forget the pasta plate, just strain the pasta & dump it straight onto the hot sauce (key: the sauce should still be very hot) into the sauce pan. Toss till you've got an even sauce/noodle ratio & sprinkle with Parmesan & serve to the hungry masses IMMEDIATELY!

TA-DA!!! There you go!
I don't mean to be a finicky whiny cook, but since you've lent me your ear I'm gonna go ahead & "whisper-breathe" into it. I firmly believe that timing is everything when you cook. The pleasantness of a meal is increased at least 50% if you serve the food HOT HOT HOT!! So be prepared to man your station till the last possible second. Better yet, have people already there with their plates. They'll thank you for it. A tip, if you have a ceramic pasta dish, place it in a pre-heated (NOT RUNNING) oven for a few minutes while you're waiting for the pasta to finish cooking. Keep the sauce hot till the last minute.

I can't aptly express my disappointment at the times I made a fantastic pasta too early & then waited 15 minutes because people were not ready to come to the table yet & watching TIME turn it into overdone bloated sad pasta fiasco. Or worse yet making it on time & then having it get cold because you didn't come. So be a pal & come to dinner on time! (eh-hum!) That is all, thanks for the ear.


Happy Hunting!

Saturday, October 18, 2008

Roasted Pumpkin & Garlic Soup

I've been wanting to post about this soup for sometime. I discovered this at the end of winter last year so I only made it once & then again recently and my judgement is......

This soup is a winner!

I would say this is a manly soup (whatever that means). If your man likes a rich/nutty/sweet/near barbequed taste, then -- this soup you must try!

Even my "pumpkin-wary" husband went totally berserk over this soup. With a little home made bread, this would dress up any dinner, real nicely. So stop being a "kabocha wimp" & do it, NOW!!
Again, this is from the cookbook "Masterclass in Italian cooking". Unlike some of the other recipes, the ingr. are simple & instructions very basic. Again my embellishments in blue.

1 small pumpkin (750g/1 lb 10oz)
6 cloves garlic (I used only 3 as the kids didn't go for the garlic taste as much as DH & I)
4 tbsp olive oil
2 med onions, chopped (1 is passable)
2 celery sticks, chopped
1/4 c rice (I use a little less, @ 3 tbsp, Japanese rice is a little more glutinous so it was too thick with 1/4 a c.)
7 c vegetable or chicken stock (or use 4-5 chicken bullion cubes)
Salt & pepper to taste

And here goes the assembly. WELL, don't just stand there!! Grab your kabocha, friend!!!

Use 2 tbsp of olive oil & toss UNPEELED garlic & chopped pumpkin on a baking tray. IMPORTANT: Keep them away from each other for even browning, on all sides.
Just lop the end off the garlic & leave whole. Grill at 200c (400F) for about 20-30 min. Or till just golden brown.
Purrrfect. Be sure to pop the garlic out of their skins. Saute up onion & celery (didn't have it this time) in the other 2 tbsp of olive oil for about 10 min.
Throw in onion & rice in the simmering chicken stock, simmer for about 15-20 min. Add pumpkin & garlic & simmer for another 5-10. Throw it all in the blender & blend away, baby!!
Taste & season! Yes, it tastes as good as it looks. (unless you make immature remarks about it looking like baby poo.....for shame)
I even threw in a little bit of milk to thin it out even further (when I used the full 1/4 c of rice) & it was just soooooooo good, I would be terribly tempted to splash a dollip of cream & Italian parsely when serving.
OK, you have permission to lick the bottom of the bowl, I know I am going to!

Wednesday, September 17, 2008

PESTO IS BESTO!!

If you’ve never grown fresh basil, YOU MUST! If you’ve never taken a bunch of basil & made Pesto, YOU MUST!! That’s right you MUST!! Now, I’m hesitant to get on my pesto “soap box” to wax poetic about pesto but I can’t think of anything that rhymes with Pesto. (Masa? Ideas?) But I will say that if there's any way to preserve a piece of summer & pull it out on one of those freezing, gloomy winter days, this could be your answer. (Well, if you’ve got the means, I suppose flying to Hawaii could also be the answer, but anyway)

Oh………….well, alright if you insist. (grabs wooden crate & climbs on top) Basically, pesto has just got to be the simplest way to use basil & to keep the fresh taste of basil when you don't have it growing fresh. Pesto is basically idiot proof, which is really great for me. All you have to do is grab a bunch of basil, some garlic, olive oil & a few pine nuts & blend it. How hard is that? Oooh, it’s so good, even just a tiny tsp. full will add some great flavor to pretty much any dish you put it in. Plus it’s GREEN. I mean, who doesn’t like green? And the list of things you can put it on are endless, off the top of my head:

- As a base for cream pastas
- Or cold pastas
- On focaccia
- Or as a base for cheese toasts
- In dressings (ask Chala about this great ‘cheat’)
- In a sandwich (spread it on the bread)
- In a tomato/cucumber tossed salad
- In a sauce for fish (sour cream based)
- With chicken (try Parmesan chicken with pesto in the butter, it’ll give your guests quite the scare, so beware)
- With tofu….(yeah you heard me, shhh, don’t give me no lip!) If you use momen dofu, it makes the tofu taste like a sort of cheese. My kids Loooove it!

Well, you know summer is officially over when you bring in a big harvest of basil for pesto & freeze it instead of canning it and this is what I did today.

So here's the dealo:

Mind you, I usually make pesto with no recipe, there are various suggestions for levels of olive oil or garlic. Generally most traditional recipes include pine nuts or other nuts to make it more like a creamy spread than an blended oil. Now they are pretty pricey here in Jap-Jap, but I don't suggest substituting with walnuts cuz' they have a pretty bitter skin, the good news is that Parmesan cheese also makes it pretty creamy. Anyway, here’s the basic scoop:

4 cups of packed freshly picked basil (best to pick it first thing in the morning or evening, for better release of the oils)
1 ½ c extra virgin olive oil
2 garlic cloves peeled
½ tsp salt
1/3 c pine nuts
1/3 c Parmesan cheese

Wash the basil & drain of water (use a salad spinner if you have one, Kari J )
Put basil, garlic, salt, pine nuts & Parmesan cheese in blender with about ½ c of olive oil.Blend pulsing, and push the basil down occasionally with a long spoon or cooking chopsticks. But PLEASE make sure the blender is off or you will have a nasty surprise involving broken metal ware & lots of green oily business on your clothing & face.
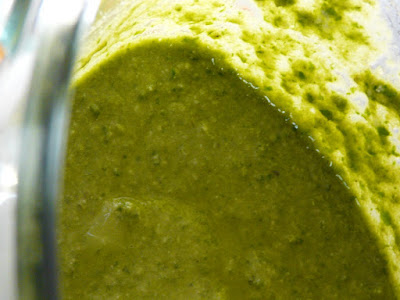
When the basil is basically chopped small, add the rest of the oil in a small stream till it’s well blended. You can add more olive oil accordingly. Some people like the pesto kinda chunky but I like it SMMOOOOTH!! Mmm-hmm! So blend away, baby! Lookie there! That's some handsome green goop. That made about 2 cups or so.

Now you can store it in a jar for months, though the top layer will always discolor with exposure to the air. So seal tightly & don’t be surprised if it turns brownish-black on the top.
If you want to freeze it you can either put it into an ice tray. (though good luck cleaning the tray when you’re done) I freeze it in a large Tupperware & then chop it & put it into zip lock bags. Then when you want to use it just pop it into a bowl to defrost or microwave for a couple of secs.

Now who could ask for anything more?

Saturday, August 23, 2008

Midevial NOT Capon salad

I wanted to write something dramatic & romantic about this salad. I mean look at it? Who cares if it was just one dish out of 250 dramatic & romantic dishes on the table that night. That just looks good to me!

Well, I guess, to the untrained eye it can be construed as a pile of over boiled chicken breast with bloated raisins smashed on top. And maybe I'm the only one who can really look at & appreciate the time & effort it took.

Before I tell you about this venture let me just clarify that I did NOT find capons. Which I'm sure you knew already, is(and I did too once I googled it & nearly spewed coffee all over the computer) a castorated male chicken!! So yeah, I would've felt awful about using capons, as if their life wasn't bad enough already, poor guys!!

The recipe was roughly 2 pages long. I normally stay away from long lists & instructions but I couldn't help it, it was just fun from start to finish. I started this dish 4 days before the party. First off I prepared a broth with a bouquet garni of Italian Parsley, rosemary & laurel leaves (from my garden, and the neighbor's laurel tree, eh-hum), 10 whole black pepper corns, 2 onions, & 4 celery stalks, 4 carrots. I feel medieval already, grrr. Oh, mustn't forget the 1 kg worth of chicken wings.
After an hr or so the broth looked like that -- and it smelled sooo good! At this point I indulgently poured 1/2 a bottle of white wine in & simmered some more. (As if it didn't smell good enough already) Now comes the part where we give the chickens a nice warm bath (one at a time of course), for about one hour & then set for another 2 till cooled. Skimming off the top. See, this picture makes me want to skim, see that gunkus on the right side? Tsk tsk!
Now to dry off. Well, not so glorious looking now are we? Into the fridge and then stripped down to the bone. Of course I got to hog the broth strained & froze it and I'm saving it for a cool rainy day to make a great soup, just you wait. (though it stands great on it's own, with just a little sea salt, DH kept coming back for samples)
Oh goodie, here's my favorite part. I just felt so happy making this. And I will use this dressing regularly. Peeled the rind of 2 lemons & 2 oranges, 2 cinnamon sticks & 3 laurel leaves, 1 c of red wine vinegar, 1 c raisins, 1 tsp crushed pepper, 3 tbsp powdered sugar
Bring this all to a ever so slight simmer to infuse the vinegar, then leave to soak for a while, discard the laurel & cinnamon sticks. (or if you have a silly 2 year old let her walk around the house sucking on them saying "I'm eating cinanin bark"). Toss the chicken & dressing & let the flavors mature for 3 whole days. Yeah, you heard me, I guess that's the medieval part, huh? Garnished with 1 c of pine nuts, 1/2 c of chopped Italian parsley & 1/2 c extra virgin olive oil. If you happened to be there & taste this, I hope it was any good. I sure enjoyed it. It was the fact that the orange & lemon rind gave it an extra zing & the raisins were quite soaked through with the vinegratte that made me love it. Not to mention the chicken itself was tender & flavorful. Mind you, I don't know if I'll ever make it again. As you can imagine it's not a very cheap salad. But that's my story & I wanted to tell it.

Oh & PS: if any one has a good "why-did-the-castorated-male-chicken-cross-the-road" joke I'd love to hear it.

Sunday, August 10, 2008

Tomato & Mozzarella

Isn't it the most gorgeous/ simple combination of perfection on God's Green Earth? Red & white with a little green. I've told my kids the Italian flag is green, white & red because of basil, mozzarella & tomato. Correct me if I'm wrong Italians? (Hey, I also teach them Japan's flag is a obento with an umeboshi in the middle. Don't get me started on other countries)

This salad has my husband's stamp of 100% approval on it.

The story goes like this: The first time I invited Josh to dinner at our home was for Christmas Dinner so I was going all out trying to impress him. (of course I was) After working all day in the kitchen and then trying to look like I hadn't been working all day in the kitchen, I believe he was genuinely surprised. (you know, that face where he's impressed but trying not to look impressed? He didn't know I could) The part though where he decided to marry me & live happily ever after was when only a few guests nibbled at the tomato & mozzarella salad & by the end of the meal when everyone was packing in those last few desserts, he was contentedly sitting with two plates of tomatoes & mozzarella before him & happily scarfing down all the remainder. Murmuring his approval as he tilted the plate & downed the dressing as well.........and then of course we went & had 6 kids. THE END!!!

Juuuuust kidding!

Well, if you can't get it by looking at the pictures I don't really know how to help you. Slice it, arrange it, sprinkle plenty of salt & pepper on it, rip some basil onto it, drizzle olive oil over it & that's it. Generally it's proper to use red-wine vinegar & extra virgin olive oil but I agree balsamic vinegar will do great too if you like that strong-manly taste. The above picture has some mixed nuts left over from my another dish but I thought it was purty.

Here's the alternative "summer veggie salad". Which I'm sorry to say did NOT get the DH's stamp of approval. Due to the presence of eggplant & zucchini. Slice & saute the veggies in olive oil & add them to the process. Roughly 75% of my kids liked it. (that's lemon thyme in the middle & I bet it would taste awesome sprinkled over the salad in place of basil.)
And if it's winter & you don't have any fresh basil, I wouldn't substitute the dry basil with it's "sawdust" consistency on top, it really doesn't go over too well. Just have it as is! (Note the black balsamic vinegar)

Note: Don't refrigerate too long before eating if you've salted it or a lot of the tomatoes juice will drain out. Plus it looks so nice with that "I-just-took-a- shower-in- olive- oil" look.

Thursday, July 17, 2008

Gotta love those Italians!

When your husband says that something you made tastes like something in a restaurant, you must then go & blog about it.

I had the "creativity itch" & wanted to try out 3 new items in one dinner with 1 hr. to cook, not the best idea. But as I tend to think, hurried cooking is usually the best.

So, here’s what we had:

Courgettes & carrots “a scapece”
Italian tomato & egg torta
Iced tomato & bell pepper soup with salsa verde

I really want to expound on two of these so lets just get the first one over with & say it was “maa-maa”. I was never a zuchinni fan and would’ve never bought these if they hadn’t been on SUPER sale And what I thought would be reeeallly great was just “so-so” (I’d like to know how you say that in Italiano” BTW) of course I didn’t have any fresh mint so it really wasn’t the “real deal” anyway.

Thinly sliced & sauteed courgettes & carrots
Seasoned w/ S&P, & tossed with a wine vinegar & mint dressing with capers. (mine was mintless) I imagined a bright beautiful dish but it was dull in color & I think that seemed to brainwash my palate too & I just felt it was not that great. Though I must say that the caramelized courgettes were pretty darn good. Unfortunately I seemed to be the only one would was even gracious enough to give it an “OK” review. Husband & kids were not fans! Oh, well!

The Popular Torta:
It was a pretty simple dish and lovely of lovelies it can be served hot or cold. Though again, I had to stray pretty far from the recipe as I (unlike some) do NOT have a wheel of Parmesan & Romano cheese in my cellar (if you do, please let me be your friend?) I substituted with the fake Parma & a token amount of Monterrey Jack/Cheddar mix (from Costco). It was fun to make & just as fun to eat.

Basically layering, a little Parmesan, cherry tomatoes, olive oil, (I ended up cutting the tomatoes in halves)Pouring on the blended egg/cream/cheese/basil/salt & pepper mixture. Bake at 200 for 20-25
TA-DA!!! It was pretty good actually & I will be making it again, esp since my husband raved about it.
The SOUP & Salsa Verde:

Oh Joy, this soup made me happy on so many levels. Something about the redness of it & the ice just made me happy-happy-happy. As expected Josh & I were the only true fans, though the kids drank a token bit & tried to be kind about it. (Sweeties!) It tastes better with time (1 or 2 days). Not only that but we had some ice cold at the pool the next day. Then I made a Bloody Mary with it that night, I used the left over for pasta sauce the next day & then for chili sauce the day after.

This was not difficult but the salsa was a bit more time consuming. For the soup: Peeling the tomatoes, chopping red peppers, garlic & chili pepper.
Blending Adding olive oil & tomato juice. Boy, it don't get more red than that.Then the salsa (which will keep for a month) was a blend of: pounded garlic & salt (till it was creamy) chopped anchovy, capers, fresh parsley/basil (again no mint) olive oil, lemon & black pepper.

So you serve the soup with ice & top it with the salsa. Good Lord God Almighty, if you want a good summer soup, this is it. BROTHER, this is THE soup! And I tell you it wasn’t too bad with some vodka & a little xtra crushed pepper after a long day of playing Mommy.
We even brought some with us to the pool, something about sipping on something as gormet as that in plastic cups.

This soup & consequent left-over inventions drew some caveman-like grunts of approval from my tomato loving husband (I believe this is the highest form of appreciation man can give you, it shows his brain has shut down completely to enjoy the food, thus the pre-historic complements) & I have to say I wasn’t terribly disappointed with the pasta sauce it produced when I threw about ½ a cup in with some sautéed garlic & chili with ingen & basil & heated on high for a few min. Or the chilli it produced when I dumped the last of it in a pot with another can of tomatoes & added ground beef & other “chili” flavorings.

Can we just all move to Italy or something?

Saturday, June 21, 2008

Spaghettini con Salsa di Pomodori Cruda


I MUST post this recipe! And it’s just for YOU, who ever you are! This is a recipe for winning someone’s heart! I mean it! You wanna tell someone you REEEEAAALLLLY love them, make this. I can gurentee, this will score you great big chuncks of "brownie-points"....how many languages do I have to say this in? Zehi, yatte mitte kudasai! YOROSHIKU ONEGAI ITASHIMASU!

But anyway, this recipe has been staring at me from my folder for a few months, rolling it's recipe-eye-balls at me for not trying it already. With it’s “match-made-in-heaven” trio of fresh tomatoes, basil & olive oil, what was I waiting for? I was just biding my time, waiting for the basil.

Yeah, that’s right. I’m the creepy looking housewife in the backyard with her watering can, thinking "happy" thoughts to my basil so that they will grow & I can consequently eat them.

Now that the warm weather is in full swing so are my basil & not only have I made my first jar of pesto, I'm lovin’ the pastas now!

So without further ado. I will be sorely offended if a certain Aussie chef who wears a “Michelangelo’s David” apron, doesn’t try this out. (Junior, you better not have one of those aprons too, or I'll DIE) For that matter, if you read this blog & you know how to boil pasta noodles, then try this. It’ll make you feel like a pro.

This is from the Italian cookbook “Masterclass in Italian Cooking” (Thank you, Chiba Library) My embellishments are in blue.
-----------------------------------------------
This is a recipe for hot clammy days. It relies on the very best, sweetest tomatoes, which must be ripe & very red. Key Step: Make the sauce the night before.

Serves 12

1 kg sweetest tomatoes (I used 6 large ones)
4 tbsp extra virgin oil
2 clove new season’s garlic, peeled & finely sliced (I didn’t really follow things here & gently sauted the garlic in the oil before adding)
a large handful of fresh basil leaves (oooh, my handfuls were LARGE and greedy)
sea salt
cooked spaghettini, to serve (that’s slightly thinner than the normal spaghetti, but I’m sure anything will do, I bet it would be great with penne. I used 1 kg.)

Wash the tomatoes & remove the stalks. Skin them by plunging them in boiling water for a couple of minutes (about one is fine)

Chop them roughly, put them into a sterile preserving jar. (I just used a glass dish with a lid) add the extra virgin olive oil, add the sliced garlic, tear the basil into pieces & add this to the tomatoes. (did you know, tearing basil brings out the flavor, because it bruises each leaf better than cutting would, whod'a thunk!) Season with salt & mix well. (I used about a tsp of salt) Cover & refrigerate overnight.

Warm the sauce gently for about 10 min, just to take the chill from it. (Or leave it at room temp for 20 min) & serve on spaghettini cooked al dente.
---------------------------------------------------

And that’s it! I didn’t warm the sauce, in fact I made it a chilled pasta by cooling off the pasta noodles (dousing them with pot-fulls of cold water after cooking) & as a twist & added some sauted fava beans (sora-mame).

I did add a few more tbsp of olive oil at the end of it all, and it was…….mouthwateringly refreshing & flavorsome. This is the summer pasta for me! Simplicity is a beautiful thing, dear, eat it up while it's fresh. Bon Apitite!

Wednesday, May 14, 2008

Quick Fix #3 -- Roasted Rosemary Potatoes

This quick fix is not really so quick, but it sure is good & simple. An easy enough recipe to remember, fairly simple preparation gets rewarding results. I only have two words for you ----- FRESH ROSEMARY!!!

That’s right, PLEASE go fresh & for very little effort you’ll score big points in the kitchen. Rosemary grows fine in nearly any weather (prefers hotter weather & sandy soil) but get a baby & in a few yrs it’ll grow to be a bush. AMEN!? A big plus is that it doesn't require daily watering. (great for forgetful moms!)

I love these potatoes cuz’ they’re a great alternative to the tedious & primitive practice of “deep frying” (ewww....bygones) but still gives my little audience something to drown in ketchup. (Did I just say that? God forbid!)

Here are the players (btw. My recipes feed roughly a party of 10):

- enough potatoes to fill up a 5 l. pot. (peeled & sliced into 3 cm. cubes)
- large bunch of rosemary (about 10 sprigs, 5 cm. long, diced stem & all)
- 1/3 c Olive oil (roughly but you can use more or less)
- 1 tsp salt
Cook potatoes till tender but NOT dissolving. (Please, just do that one thing for me?) Strain & leave to cool a little. Put olive oil in baking tray. You may need two trays? Set oven to 175c. Mix potatoes on the baking tray (to coat with oil) sprinkle salt & rosemary. Bake for 1 hr, mixing (GENTLY, please) once or twice. The aroma of the rosemary will send your household into a crazed dash for an early dinner. SERVE STEAMING HOT!!

You can match these with so many dishes from classic burger or meat sauces to a side dish to any good Italian meal.

FORGET ME NOT: Time is essential, this won’t work on high heat cuz’ you’re rushed for time, so plan ahead. It takes about ½ hr to get the potatoes, peeled/cut/boiled & in the oven.

HEALTHY TIP: Leave the peels on, believe it or not they taste even better in my opinion with the peel & retain a whole lot more nutrition.

Sunday, January 14, 2007

Eggplant a-la-Salada

Here’s something for all you beri-genki nasu fans out there.

Now, I'd like to give credit where credit is due, this recipe is just my take on a salad that was made originally for me by Keiko. She helped start me on the road to reconsiliation as far as my rocky relationship with nasu is concerned. Up until then we were not on speaking terms other than the occasional very crispy & well made tempura nasu. My version of course, is most inferior compared to hers, as Keiko added the famous Baysidian secret weapon of “Thai Sauce”. (Secret no longer, mwwah hah!)

Masa: Ah-ha it’s sandwiches for lunch, bring out the Thai sauce
Keiko: Ohhh, it’s salad for dinner, bring out the Thai sauce
Benny: Mmm…it’s dried fishies for snack, bring out the Thai sauce

OK, so I personally don’t use the Thai sauce for this, call me traditional but I don't really like adding it to "Italian food", unless you can't notice it, (except, eh hum, Italian dressing...heh! Shh, don't tell Michael I told you, just a tbsp or 2.). But you can if it works for you. Here’s my take :

6-7 smaller eggplants
oil for frying
¼ c olive oil
5 garlic cloves, sliced
1 dry red pepper
a few strips of bacon, cut into 1cm strips
½ onion, thinly sliced
1 tomato or 2, diced
salt & pepper
2-3 tbsp vinegar (red wine, or balsamico if you like it)
basil (fresh is even better)
Parmesan cheese

Preparation: Chop the eggplant 1 cm thick soak in salt water for 10 min. Drain & fry with oil on med/low heat till browned on both sides. (eggplant=sponge, you really need to add some oil to get it to “caramelize” on the outside, keep the flame low) lay eggplant on flat dish. Fry up bacon strips, set aside, fry up garlic & red pepper in oil.

(ideally you should let the garlic soak in the olive oil for quite awhile before frying) keep the heat low, turn off the heat right when the edges start to brown, let the garlic soak & discard the pepper)

Now for the assembly: Sprinkle bacon over eggplant, next onion, diced tomatoes, & spoon garlic & the garlic/olive oil & vinegar over it all. Salt & pepper to taste (my taste: LIBERALLY) & basil. Lastly sprinkle with Parmesan cheese.

Note: This salad is a sooo purrty & great served cold, so make it in advance. A bed of lettuce would give a great presentation, I'd imagine & could probobly turn it into a main salad rather than a side dish.
Also, I wouldn’t say you need every ingredient on here, but I would have to say the onion, garlic & tomato are pretty essential. You can of course try other toppings: thin red & yellow paprika slices, sautéed mushrooms, black olives or, of course…….THAI SAUCE!!

PS: Pictures (random & hurried) by Al'
Dish: Iven & Kari & home, Yippie! Thank you so much for the dish set, again!